How do you Install WordPress on your server? Most of us already know WordPress is the best platform for blogging and is excellent for Content Management Systems (CMS) compared to others like Joomla, Drupal, etc. Most successful bloggers worldwide have created millions per year by using this platform. This is a fantastic figure!
"We have updated our tutorial on "How to install WordPress manually" Check out the new version for more detailed and straightforward instructions!"
Table of Contents
Do you want to be one of them?
If so, let's first learn how to create your WordPress site!
A Little About WordPress
Almost 43% of websites in the world are powered by WordPress.
| CMS | % Website User |
|---|---|
| Wix | 1.3 |
| WordPress | 43 |
| Joomla | 2.6 |
| Drupal | 1.7 |
| Squarespace | 1.5 |
Why has WordPress become so popular compared to others?
WordPress is an open source licensed under GPL license, which everyone can use to edit or modify for free. It is flexible. If you are a website programmer, you can change your WordPress site to anything. But, if you are not a website programmer, it is enough for you to use Themes and Plugins directly.
Before you learn how to install wordpress, you must know what you must prepare for it.
Things To Do Before Install WordPress
First of all, you must get a domain and hosting.
What is a domain? What is hosting?
- Domain - Address for website. Ex: www.yourdomain.com
- Hosting - Server to save all files and databases on your site, such as codes, images, text, etc.
Where must you get it?
I recommend you to get domain dan hosting from this company:
- FastComet (First Choice - Recommended)
- BlueHost
- SiteGround
- HostGator
- InMotion Hosting
I have tried all of these companies, and they are all the best hosting providers in the world. But now, I use FastComet because only this hosting provides a suitable website environment.
Let's start with installing WordPress and making money from your blog.
How to Install WordPress (Two Easy Methods)
Here, I will show you two methods for installing WordPress yourself. The first method uses Softaculous on your cPanel, and the second is manual installation.
Why should you know both methods?
Sometimes, when you get your hosting, by default, your hosting is not provided by Softaculous because Softaculous is not free. It is a paid application. That is why, before you get hosting, make sure they have provided this feature. For beginners, I always recommend choosing hosting that has Softaculous features.
If you have this feature on your cPanel, I recommend installing WordPress via Softaculous, which is easier and more secure than manual installation.
So, let's look at how to install wordpress using softaculous.
Method 1: Install WordPress Using Softaculous
So, if you have a Softaculous app in your cPanel, use this method because it is easier than another method.
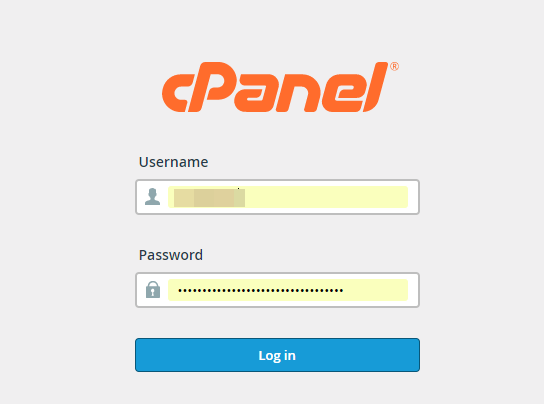
Step 1: Login to your cPanel. If you need help logging in, please refer to our guide on how to log in to cPanel.
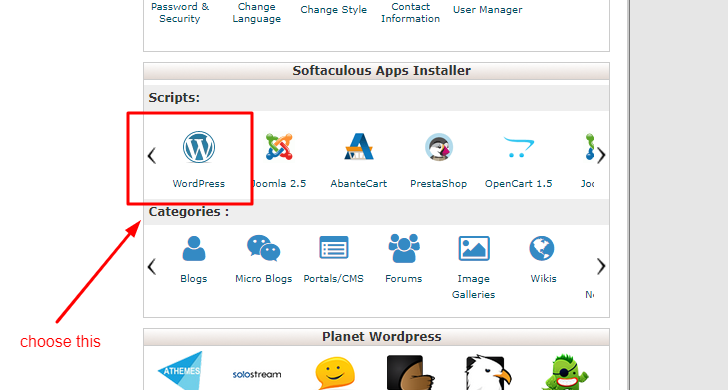
Step 2: In the section Softaculous Apps Installer, find the WordPress icon on your cPanel and click on it.
Step 3: Now, you need to fill in all requirements for installation. To make this tutorial effortless, I will separate it part by part so you can follow it easily.
Part #1: Software Setup
Part 1 is the software setup. Please look at the explanation below due to the number.
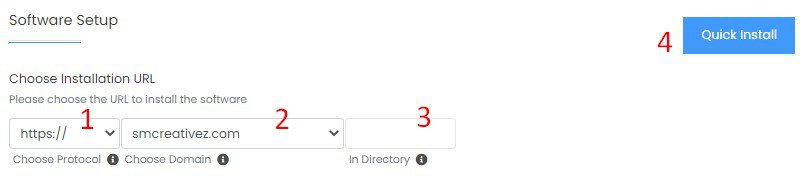
Number 1: On number 1, you need to choose the protocol for your website, whether you want to use HTTP, HTTPS, or Owwwot. This does not negatively impact your website's SEO. However, I recommend you choose "https://www" because this URL protocol looks more neutral, and now Google is more concerned about websites having SSL (https).
Number 2: Please choose your website URL. If you have added many domain names on the same cPanel, you need to decide here which one you want to install for WordPress.
Number 3: You can choose in the directory section. You can put any name here if you want to install a subdirectory.
What is a subdirectory?
For example, www.yourdomain.com/folder1, where "folder1" is a subdirectory. If you do not want to add any folder after the extension (.com.net), leave it blank here. I strongly recommend leaving it blank.
Part #2: Site Settings
You need to decide on your site name, description, and other details for site settings. Please review the explanation below.
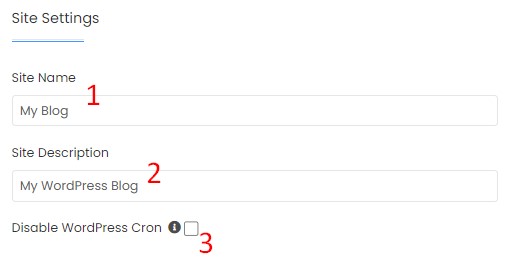
Number 1: Please decide your site name. Usually, you can put your domain here for a site name—for example, minutesguide.com.
Number 2: The site description provides some explanation of the Site Name. For example, WPBeginner's site description is "Beginner's Guide to WordPress."
Number 3: Disable WordPress Cron means, if selected, WordPress cron will be disabled, and a cron job will be added in your control panel to be executed twice an hour. So, please do not tick here.
Part #3: Admin Account
On these settings, you need to configure your admin account credentials. Please refer to the explanation below.
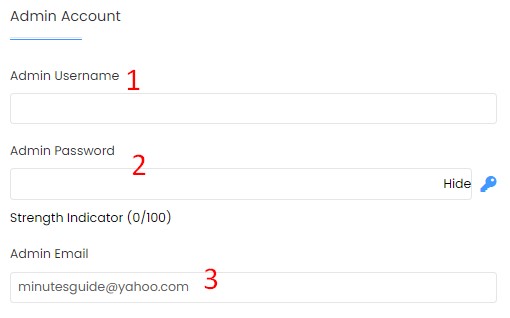
Number 1: Please consider what is best for the admin username. You cannot change it later. You can change it via phpMYAdmin only if it is pretty technical. So, please choose the best here.
Number 2: Choose a strong Admin password. I recommend using an auto-password generator. Click on the blue key to generate a random, strong password.
Number 3: Just put your email here.
Part #4: Choose Language
In this part, you can choose a language for your site.
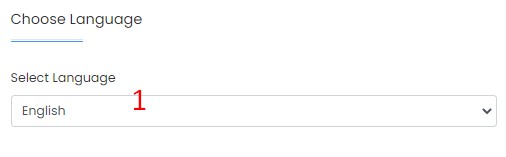
Number 1: The system will choose the English language by default. If you want to change it, click on it, and it will list any available language.
I want to select English because WordPress terms will be weird if you change to another language.
Part #5: Select Plugins
WordPress considers you to install these two plugins, Limit Login Attempts (Loginizer) and Classic Editor.
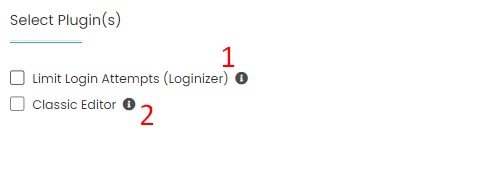
Number 1: Limit Login Attempts is a plugin that can protect your WordPress from someone who wants to log in to your WordPress site. If someone fails to log in more than three times, the system will block them from logging in.
Please decide for yourself if you want it or not.
Number 2: Classic Editor is a plugin that allows you to use the old interface of the WordPress site. For me, this is not necessary, but it depends on you.
Part #6: Advance Options
Whether you want to change it or not, this part is an option for you. If you decide to change it, please look at the explanation below.
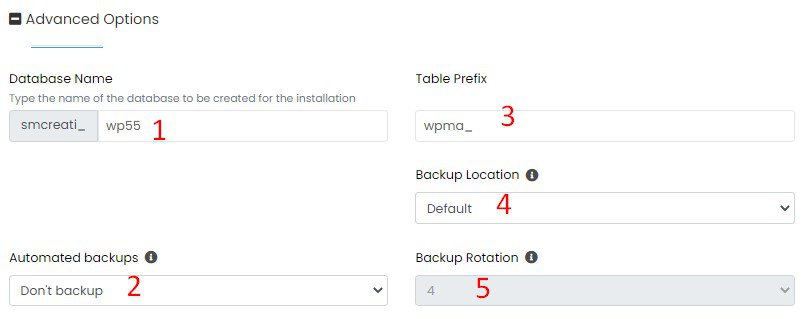
Number 1: For the database name section, you can change it. For example, "wp55" you can change to "my site" or others for your reference if you install many WordPress on the same cPanel.
Number 2: Decide whether to back up your WordPress. This backup function is not practical. You need a more robust backup system.
Number 3: For table prefixes, leave them as default.
Number 4: Choose the backup location to be used while backing up this installation.
Number 5: Backup rotation means that if the backup rotation limit is reached, Softaculous will delete the oldest backup for this installation and create a new backup. The backup will utilize your space, so choose the backup rotation per your server's available space.
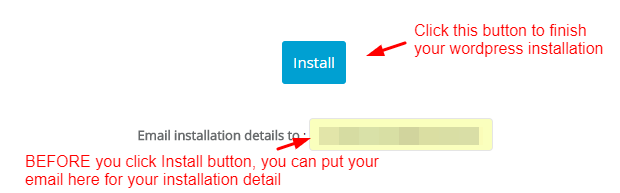
Last Step: Finally, when you are satisfied with your settings, click the install button to finish your installation. Please make sure all is correct.
If your installation is successful, you will be directed to this page.
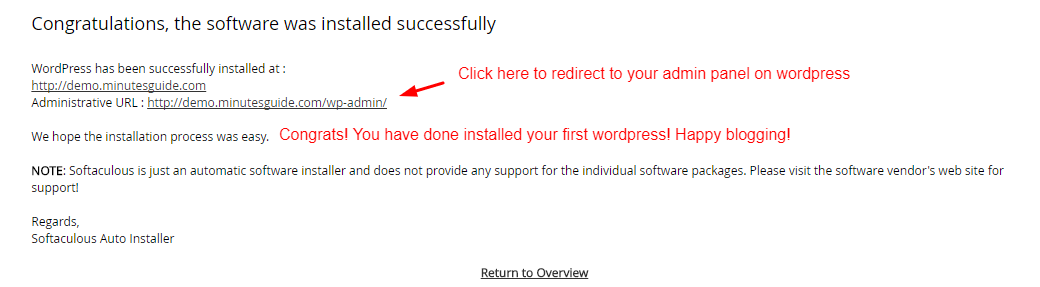
That all.
You can look here for the demo >>> http://demo.minutesguide.com/
Method 2: Install WordPress Manually
I recommend this method if you do not have the Softaculous app in your hosting or cPanel. It is the only method you can use. Do not worry; following this tutorial is as easy as ABC.
Before that, make sure you have created a new database for WordPress. Please refer to our guide on how to do this. Save this database information, as you will use it in the next step.
Step 1: First, please download the WordPress file from the WordPress official site. Save the file at an easy place to reach.
Step 2: In the second step, you must upload a WordPress file from your computer to the server.
Here, you can choose whether to use cPanel or FTP clients such as FileZilla or WinSCP to upload files to your server. Here, I like to use cPanel because it is faster than FTP for uploading files. But this is for the first-time installation only. You MUST use the FTP client if you want to upgrade your WordPress manually.
Since this is my first WordPress installation, I uploaded WordPress files to the server using cPanel. Please refer to our guide if you need help logging in to cPanel.
Where to upload it?
Continue your reading.
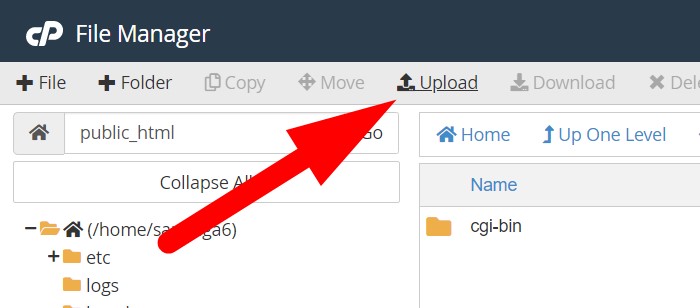
Step 3: After logging in to cPanel, go to the Files section, File manager » public_html (upload here if you install on the primary domain of server) » folder site domain (upload here if you use addon domain).
Then, upload the WordPress file that you have downloaded just now.
To upload it, click UPLOAD on the menu in the picture below.
Then click the Select File button to upload the WordPress files, and wait until the upload is complete.
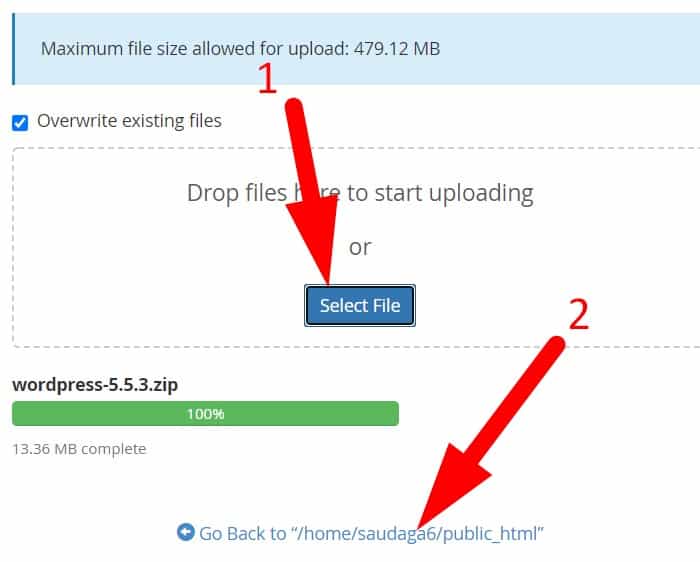
After uploading the file, click "Go Back to ..."
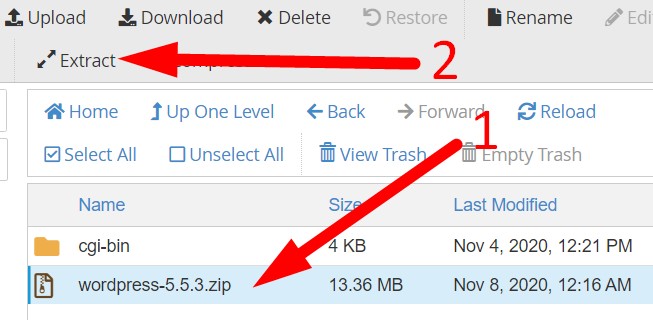
Step 4: Back to the folder of your primary domain, and you will see the WordPress file in .zip format. What you should do now is select the file and extract it. Now, all WordPress files and folders are already on your server.
Step 5: Go to your browser (ex, Google, Mozilla, or Opera) and type the URL structure like this;
https://www.yourdomain.com/wp-admin/install
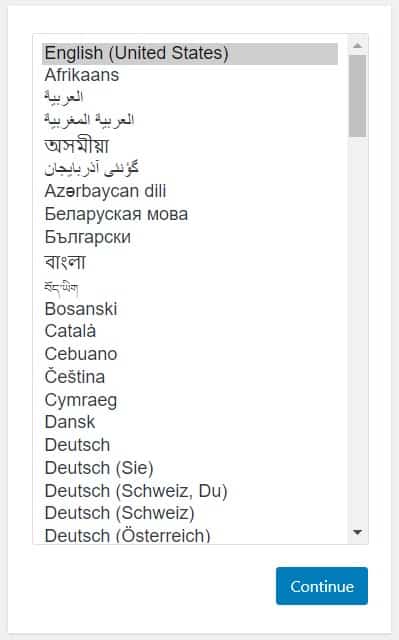
[step 6] The first thing you see on the installer page is that you need to use your preferred language. Just choose English.
Step 7: Here, you need to put your database. I told you to create a new database first because you will use it here.
Refer to the above instructions on creating a database on cPanel.
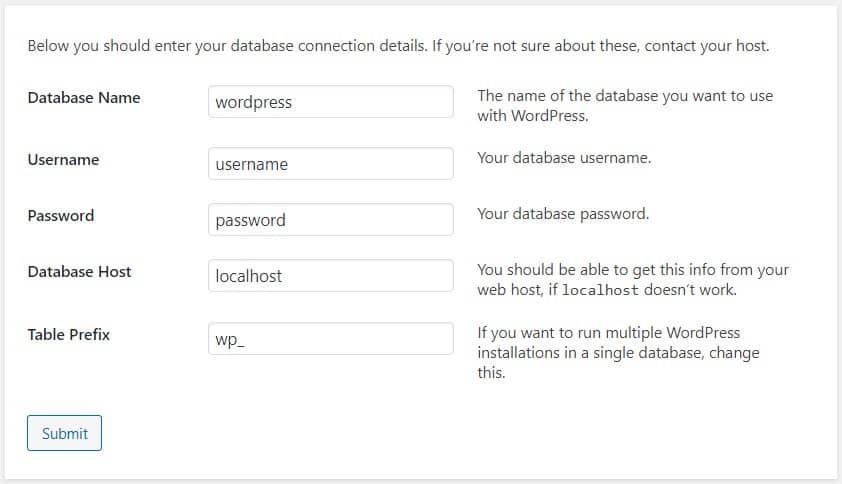
Usually, you need to enter the Database Name, Username, and Password here. ForPasswordabase Host and Table Prefix, leave them as the default.
After you fill in the information in your database, click the Submit button.
[step 8] Then, click the Run the Installation button.
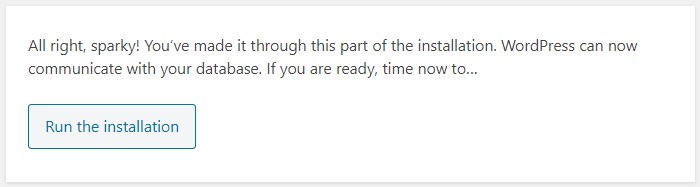
Then, you will be redirected to the configuration page for your site.
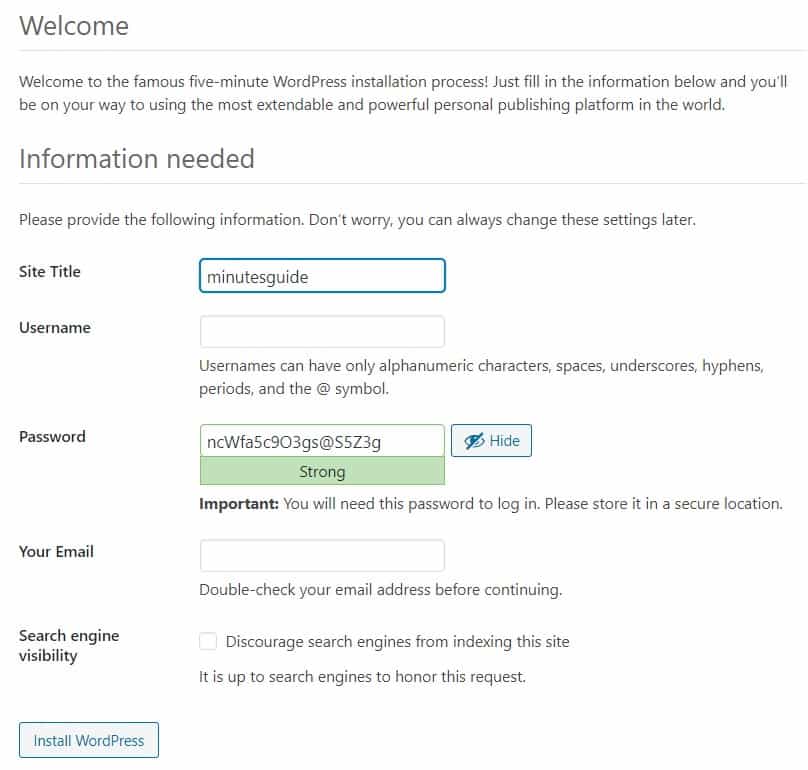
You must write your site title, username, and Passwand passwordword here. Then, click the Install WordPress button.
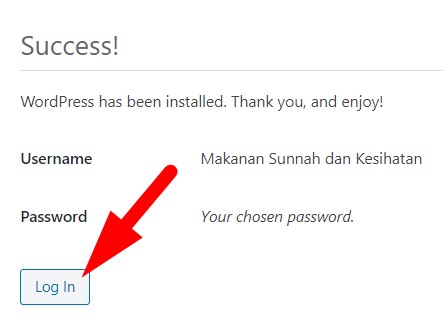
If your installation is successful, you will receive a message like the one above. Then, click the login button to log in to your site for the first time.
Next, you must delete the installation folder.
Finish!
Conclusion
Now that you have learned how to install WordPress without hiring someone, you must set up the essentials, such as permalinks. This may seem simple, but it is critical for your SEO future.
I will show you how to do it in the following tutorials.
Keep staying with me 🙂