How to Migrate WordPress from the old server to Cloudways server? Maybe you think migrating WordPress from the old server to a new server is a complex process.
No! It is not a complex process as you think. The process is straightforward, plus if you choose the best hosting, the process becomes easier for you.
Today, I will teach you how to migrate WordPress site to Cloudways where is it is a little bit different from other hosting companies. No cPanel but it has a custom file manager.
A little bit introduction about Cloudways.
Cloudways is a managed Cloud hosting where are they make us manage our own server become easier. At this time, their partners are Digital Ocean, Linode, Vultr, AWS, and Google Cloud.
if you are all familiar with hosting, you must have heard all about this hosting where are all of these companies serve the best for Cloud Hosting. So, without Cloudways to manage this server, it becomes more complex and hard for you.
Hope you all of you cleared what is Cloudways. For further intro about Cloudways, I will write it on the next article.
How to Migrate WordPress Site to Cloudways
Now, back to our main topic.
Here I will show you two methods of how you can migrate your WordPress site to Cloudways. The first method is auto migrate where we can use plugin and the second method is manual migration.
Please beware. Cloudways system not like cPanel system. It a little bit different but same concept as managing your site’s file.
So, follow this tutorial carefully.
Method 1: Auto Migration/Use plugin server by Cloudways (Recomended)
This method I very recomended for WPBeginner or WPAdvance.
Let’s get started.
Step 1: Create Server and Add Application
I assume you have created a server in Cloudways. Please choose the server which is suit for you.
At the dashboard on your Cloudways account, point your mouse to upper right and you will find “plus” symbol.
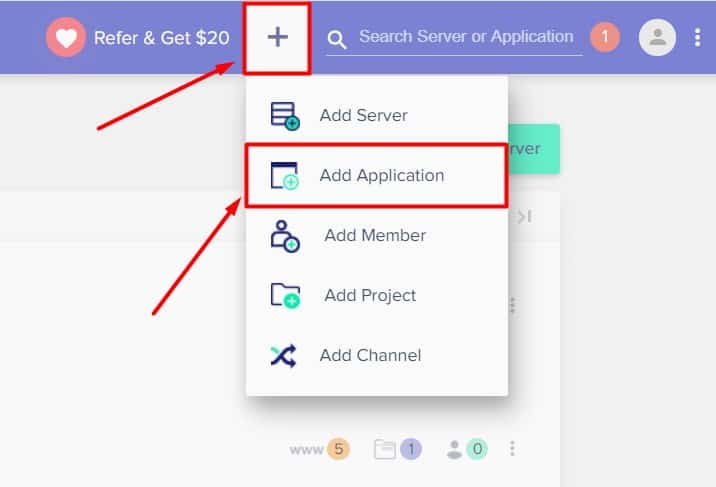
Click on plus symbol and the dropdown will appear. Click on add application.
When you click on add application, it will create a new database automatically for you to migrate your site here. You no need to create a database like cPanel before.
Next, you will see this.
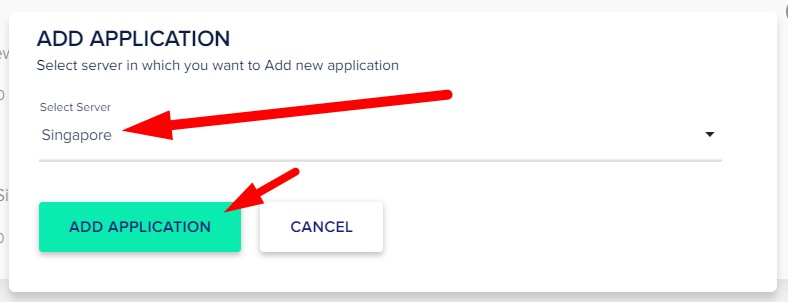
If you have more than one server created, select the server which is you wish to add the application. For example, I choose the “Singapore” server to serve my website here. Then click Add Application.
Next…
You will see this.
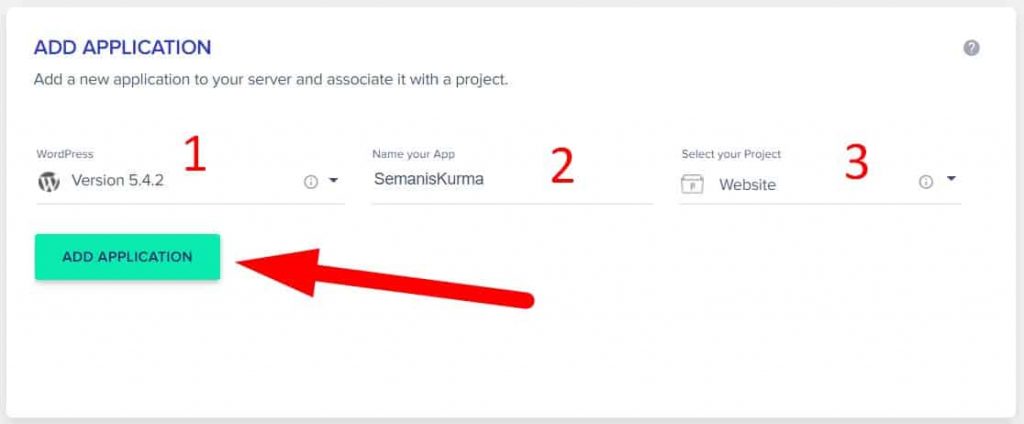
(Number 1) choose the WordPress version you wish to install. My advice is to choose the latest version of WordPress.
(Number 2) just write anything name of your application or website. This is just a note for you. You can change this later.
(Number 3) it the same as number 2. Named your name of the project. All of this just a note for you to make you manage it easier in the future. And then click Add Application.
Now, just waiting for it about 2 or 3 minutes before your application or database create on your server.

Fast Note: To create a DATABASE on Cloudways very easy. Just click add application and its database automatically.
To review your new database, please stay on the same page and follow the same as the picture below.

It would look like this.
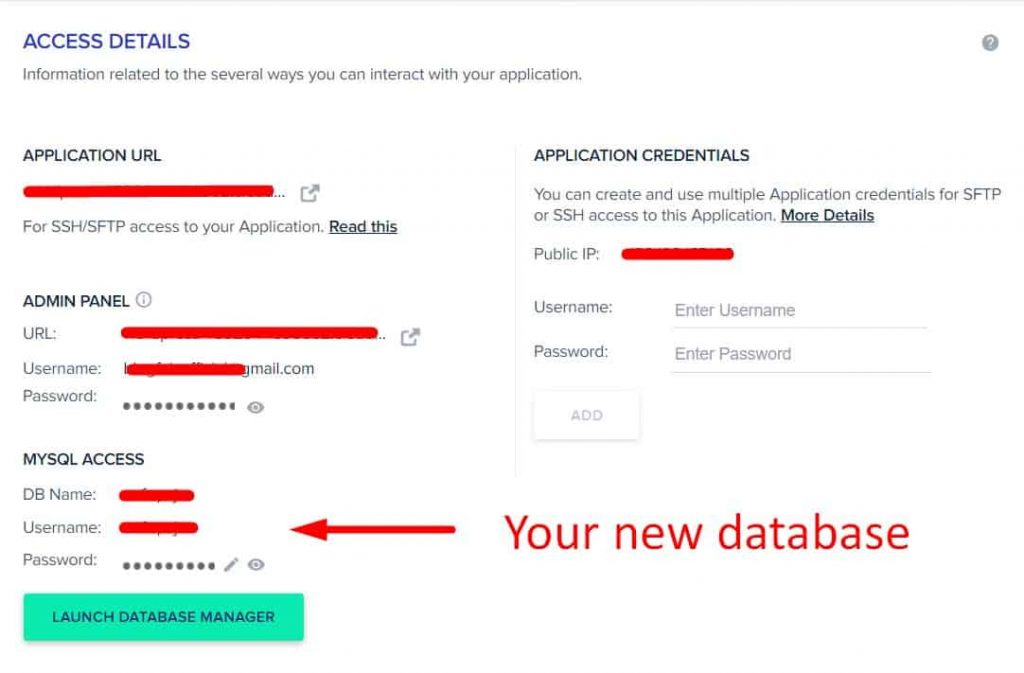
This is your new credential for database on Cloudways, SFTP login and SSH login.
Ok?
I hope until this step you can follow. You need to use all of this on the next step.
Step 2: Install Cloudways WordPress Migrator Plugin
Now your database has just been created. What you should do now is, install the migration plugin provided by Cloudways and transfer it from the old server to Cloudways.
Login to your WordPress on the old server which is you wish to migrate it. Then, install the plugin named Cloudways WordPress Migrator. If you don’t know how to install it please refer my tutorial how to install plugin.
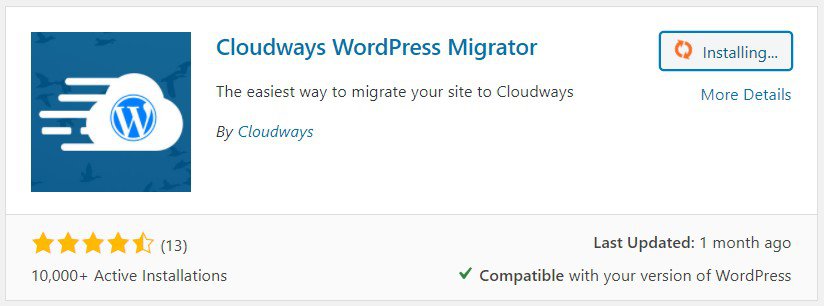
After install and activate the Cloudways WordPress Migrator plugin, you will see the same as the picture below.
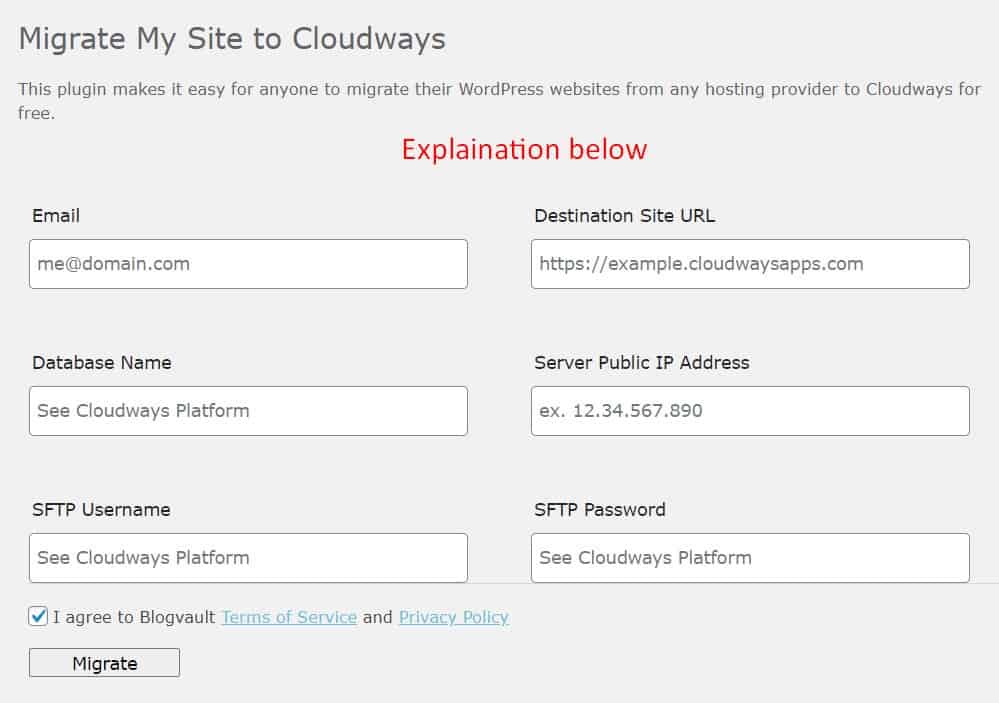
Here, we will fill up all of the required columns to start migrating sites from the old server to Cloudways.
- Email address – Enter any email address you own, most preferably Cloudways registered email address.
- Your destination site URL – You can find your Application URL within the Cloudways dashboard.
- Your DB name – Once again, this can be gain by logging into your Cloudways Platform and select an application from the top menu bar, and then click on the target application. The DB name will be visible on the screen.
- Your Server Public IP address – This is your Public IP address; you can find it under your Server tab.
- SFTP Username/Password – This is your Master’s username/password that you can find in the Server tab respectively.
After you fill all of the coloums, click on the button Migrate to start transfering file.
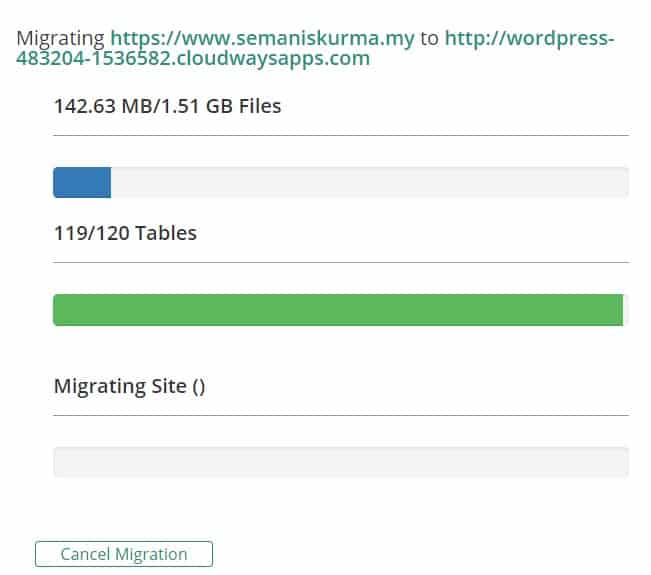
And now, the process was started and we need to wait for 1-3 hours for complete migrating process based on your file size.
If you look at the process above, it migrating from my website to a quite weird link. Just nothing. The system on Cloudways just like that. This link will disappear, no index, discourage on the search engine and redirect to our actual domain after migration complete.
Step 3: Update Primary Domain
On step 3, you need to update Primary Domain on domain management.
Login to your Cloudways account, navigate to Server (choose server) » Choose App Name » Domain Management and then enter your primary domain here.
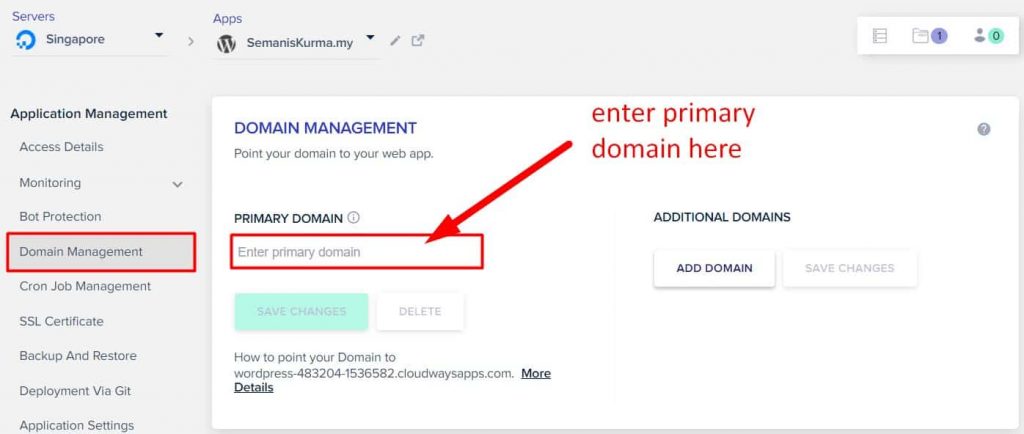
After insert primary domain, click the button Save Changes.
Step 4: Update DNS
On step 4, you need to point your domain to Cloudways. If not, your website will redirect to a weird link as shown in the picture second last above. Actually, it is a little bit different from what I have done before.
If you familiar with hosting and domain before, when we want to point the domain to another server, we will use DNS such as
- ns1.netkl.org
- ns2.netkl.org
But, on Cloudways, you need to edit directly from your domain provider account and edit their DNS using the IP address. Cannot imagine it?
Let’s get started.
Another provider, another way how you can access the DNS editor.
But all of this still same concept.
Now I go straight to DNS editor on my domain provider account.

- Hostaname – put the value “www”
- TTL – By default “14440” or “1 minutes”
- Type – Choose type “A”
- Value – Please put your IP address for your server here.
Now everything is done.
Just waiting for it full propagation.
Done!
Method 2: Manual Migration (Need Login FTP/SFTP)
Sometimes, we need to transfer the site using a manual method. But this method has a lot of technical.
So, how to do it?
Step 1: Add Application
For step 1 is same as the step 1 for auto migration method above. You need to create a New Application first. But, there is a slight difference.
During you want to choose an application to install, please choose Custom App. This process same as Method 1: Step 1: above. But you need to choose the Custom App.
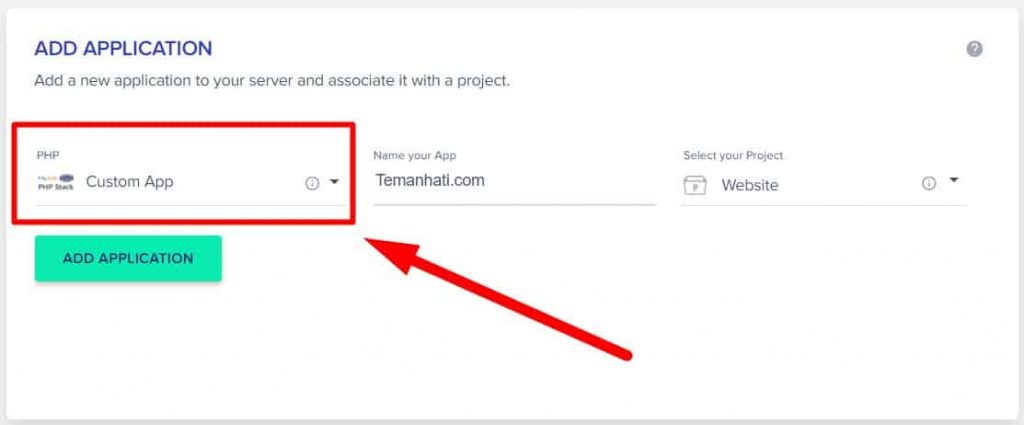
Step 2: Backup WordPress File/Database
Secondly, please backup manually your folder and database of your website on the old server. I assume before this you have cPanel on the old server and you can follow a guide on how to backup website manually.
On this step, you should download your website content and database directly from cPanel, then save it on your hard disk or any safe place on your computer.
This step only for backup in case you have a problem with your website.
Step 3: Login FTP/SFTP
Next, please open an FTP client such as Filezilla, WinSCP, or any FTP client. Personally, I love to use WinSCP because it more simple UI. If you have cPanel, you can use the file manager.
So here, I will use WinSCP as FTP client.
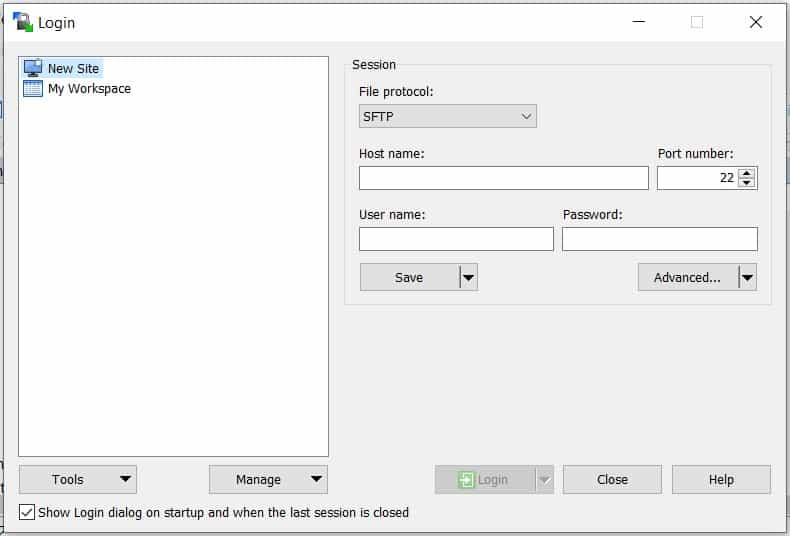
All of this info for login, you can get it in your Cloudways account.
Login to your Cloudways account » choose your server and you will find this.
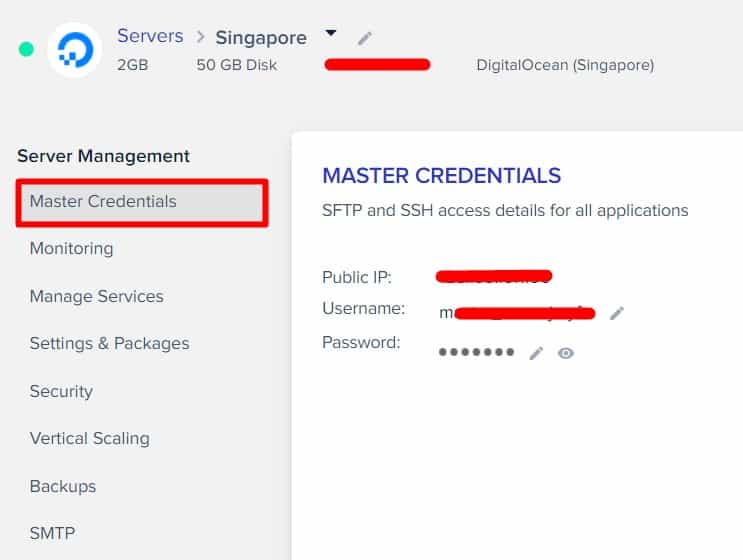
Public IP put at Host Name column, username put at username column, and password put at password column. Then, click log in.
Step 4: Upload File
When login to your SFTP, navigate to applications » your database application » public_html and upload your folder of website there (in public_html)
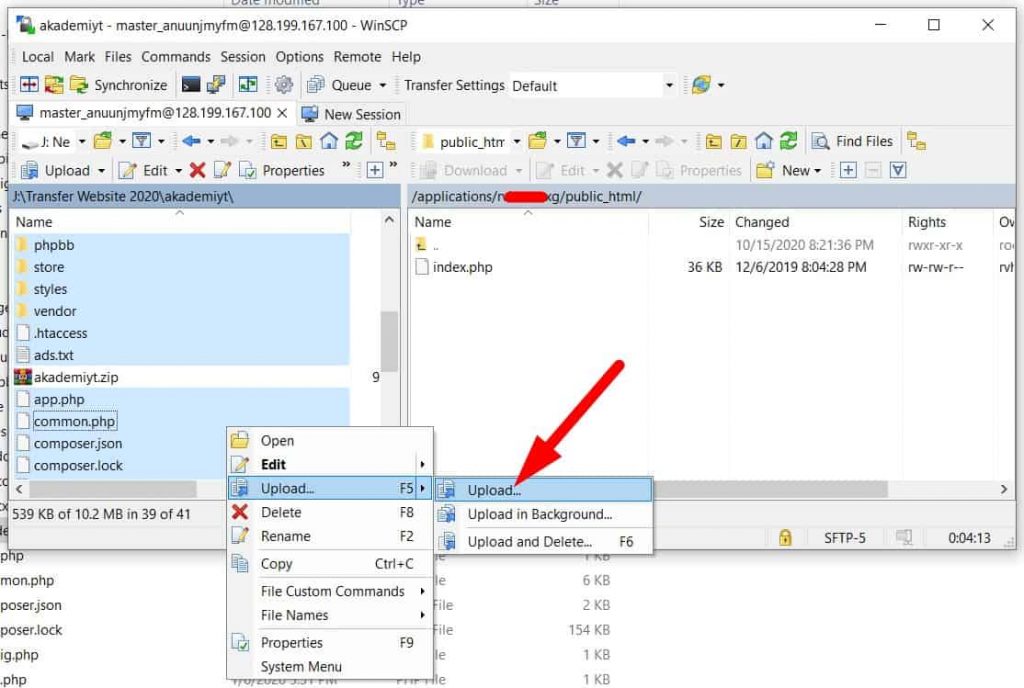
Step 5: Edit Database Configuration
After finish upload, open wp-config.php file. To open, just right click and click edit.
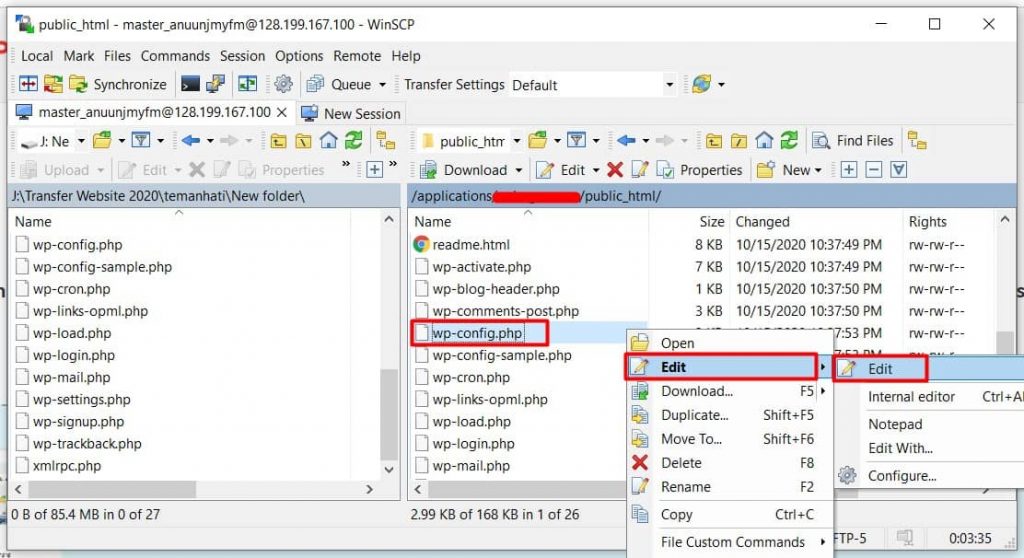
Here, you must change your database info from old to new such as DB NAME, database username and database password.
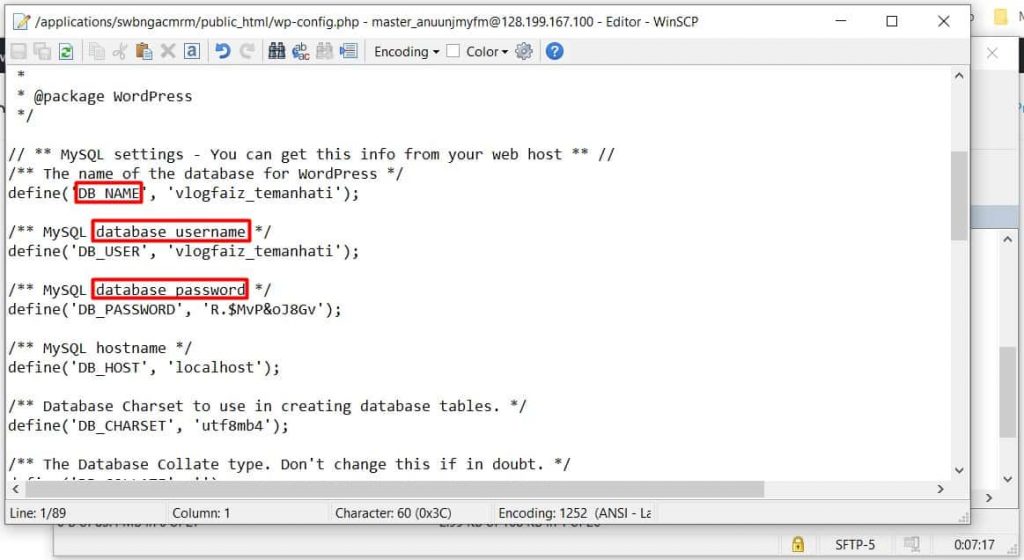
Where to get your new database?
As I told your earlier, when you create new application, automatically Cloudways will create your database. You no need to create it manual.
So, to get your new database, navigate to Server » Your Apps Name » Access Detail. About this, I have shown you at Method 1: Step 1: above.
When it done, click save.
Step 6: Upload Database
Then, you need to upload your old database to new database.
To do this login to your Cloudways account » Choose Server » App Name » Access Details and click Launch Database Manager.
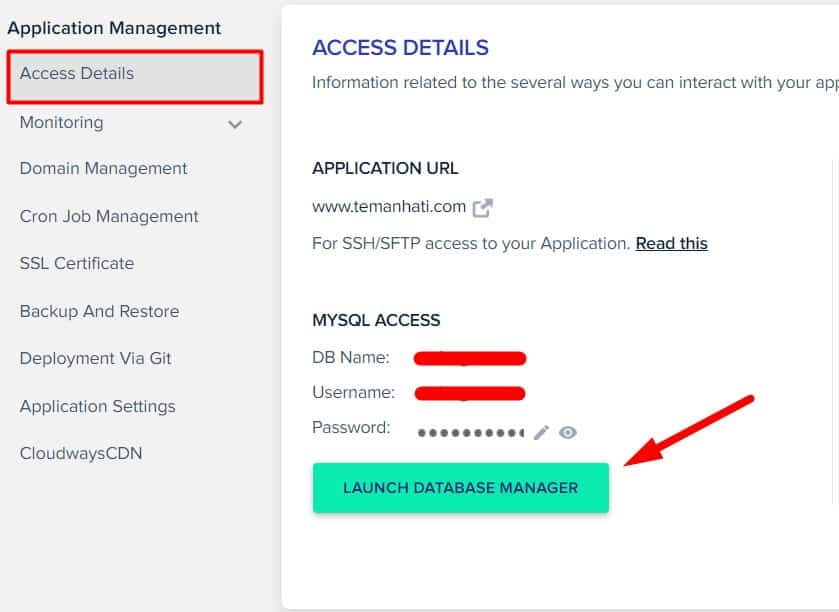
When you click the button, you will see this;
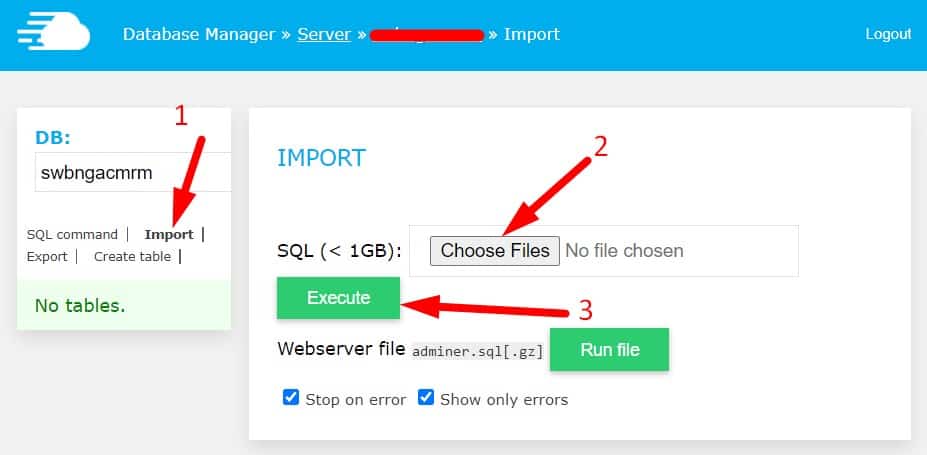
- Click import
- Choose File (your old database)
- Click on the Execute button
Your database format before uploading must be in .sql

Step 7: Update DNS
Now, you must point your domain to the Cloudways server. This step I have shown in step 4 above. Just follow the same step.
Now, you have completed your WordPress site transfer to Cloudways manually.
Conclusion
In this tutorial, I have shown you how to migrate WordPress site to Cloudways in two method. Cloudways is quiet technical to manage but it worth money and their server partner very fast. So, I recommended to try Cloudways if you want to get website run faster.

